Showing posts with label 1950s. Show all posts

Friday, July 8, 2016

The Prisoner (Frankel, 1955), The Curse of the Werewolf (Frankel, 1961)

The Prisoner
     The 1955 film, "The Prisoner" stars Alec Guinness as an imprisoned Cardinal who is psychologically manipulated by a political "Interrogator" (once an old comrade) into making a confession denouncing his own religion.  It's based on a play, but the film version features a fascinating score by the film and concert composer Benjamin Frankel.  The score was rerecorded by the Royal Liverpool Philharmonic Orchestra under the baton of Carl Davis and included on the 2006 Naxos disc, "Curse of the Werewolf And Other Film Music".


Themes
     The Prelude features a theme developed from a 2-note rising motif (Cardinal theme) which is threaded throughout the score.  The Interrogator gets a 6-note theme which falls in the first 4 notes, then rises and falls briefly near the end.  "Herrmann-esque" wind/harp/percussion ostinati also help impart the "imprisonment" atmosphere "(ex, "Cat and Mouse", "Solitary Confinement").  Some episodes feature music of a more martial nature, to represent the political turmoil resulting from the Cardinal's unfair treatment ("Civil Unrest").  Much of the music has an almost operatic or tone-poem feel to it, reflecting Frankel's background in concert composition.


Trk Dur Title Film Sequence
15 1:28 Prelude Main titles (Cardinal theme with 2-note rising motif developed in strings with supporting brass/timpani, fateful brass/oscillating wind figures, snare/brass fanfares into foreboding brass/bass drum dirge, ending in pensive strings).
16 2:53 The Prison 0:00: The Cardinal arrives at the prison and enters its gates.
0:18: The Cardinal arrives at an audience with the Interrogator, a former comrade (6-note Interrogator theme, timpani).
0:42: The Cardinal is shown to his prison cell and finds that the light fixture is permanently on.  The constant light eventually begins to bother him (tic-toc strings/vibraphone interrupted by brass sting).  He sits and crosses himself.
2:38: (unused) The food slot opens and closes a few times.  The guard enters and wakes him (pizz strings, brass, etc).
17 2:51 Cat and Mouse 0:00: The Interrogator prepares his interrogation room with bright light (Interrogator theme).
0:50: The Cardinal enters and they banter (Interrogator theme in strings dialogue against Cardinal rising motif in winds).  They discuss torture, and the Interrogator tells the Cardinal that instead, he hopes to convert him (Interrogator theme in winds, vibraphone/strings).  The Cardinal says that the idea of torture did not bother him, but that now he is afraid (Interrogator theme in vibraphone).
18 3:06 Cardinal and Interrogator 0:00: The Cardinal is blinded by light, as the Interrogator continues to press his efforts.  He compares himself to a doctor and the Cardinal as his patient (Interrogator theme in strings, harp, vibraphone).  The Cardinal calls on God's help.
1:40: A montage follows of bright lights, tape recordings, marching and interrogations (Cardinal motif in a reprise of Prelude material).  
19 1:52 Mind Games 0:00: The Interrogator finds the Cardinal dozed off and gently wakes him.  They talk about how the Cardinal found his calling in the church. 
1:36: The Interrogator tells him that he sounds tired and afraid of himself (while sketching a man inside a spider's web) (4-note ostinato).
20 3:16 Civil Unrest 0:00: Troops are sent out to settle civil unrest due to the Cardinal's arrest.
0:17: A girl is warned that protest newspapers have been banned.  Her beau, a prison guard, arrives.
0:42: The girl asks her boyfriend to leave his job behind.  They argue about the Cardinal's imprisonment.
2:07: Policemen arrive and arrest a protest journalist (piano chords, martial fanfares).  More violence erupts on the street.  A youth is shot for graffiti.
21 6:30 Solitary Confinement 0:00: (unused) The Interrogator tries to use the Cardinal's ill mother as blackmail to force him to cooperate (I think) (Interrogator theme in strings, wavering vibraphone).
1:13: (unused) The Cardinal is placed in solitary confinement.
2:19: The Interrogator prepares to observe the Cardinal during his solitary confinement indefinitely.  He begins to play a chess game (4-note ostinato developed in vibraphone, harp, timpani).
4:06: (unused) The Cardinal practices math tables but is disturbed by noises.  He begins to be disturbed when he loses his sense of time passing (4-note ostinato joined by Interrogator theme developed in strings/winds). The guard tells him that the light switch now works, but that he will probably be too afraid of the dark to turn off the lights.
22 1:48 The Dark 0:00: The Cardinal turns off the light and tries to relax (tic-toc figures leading to quote of "Dies Irae" in low winds).
0:50: He becomes disturbed (string clusters, brass/drum accents).  He turns on the light and prays to the Heavens for help.  He asks to speak to the Interrogator and begins babbling.
23 3:32 The Confession 0:00: During the Cardinal's forced public confession, he hears an unseen voice echoing the brainwashing arguments (layers of string/vibraphone figures derived from Interrogator motif).
0:35: The Cardinal falls to the ground and throws himself on the mercy of God after he completes his confession (Cardinal theme in brass).  Later, the court prays silently by candlelight for the Cardinal's sentencing, and the Interrogator looks at the somber audience with mixed emotions (brief Cardinal motif in trumpet).
1:36: He walks the riverside and reaches a fish market, which reminds him of his youthful relationship with the Cardinal (leads to rising, building figures).
2:55: A newspaper proclaims the Interrogator as a hero, and the Interrogator crushes it in anger.  He comes across graffiti of a hung Cardinal.
3:19: The Cardinal prays for madness in his jail cell.
24 1:51 Last Meal 0:00: The Interrogator's assistant tells him not to become squeamish before the verdict (Cardinal motif).  The Cardinal is sentenced to death.  His last meal is wheeled to him.
0:26: The Cardinal (now released) tells the guard not to judge the priesthood by the priest (Cardinal motif developed in strings).  He walks free of his cell, as the Interrogator now faces an investigation in a prison of his own making (snare/brass/wind figures).  The Interrogator toys with his gun and then looks out the window as the Cardinal leaves to face a crowd of silent people.
25 1:23 Finale The Cardinal walks away from the prison gate, as the silent crowd parts before him (Cardinal motif developed in strings).  He walks off alone.  End title.


The Curse of the Wolfman
     The Naxos release described above also included most of the score from "The Curse of the Werewolf", a soundtrack which is reputedly one of the first "12-tone" film scores.  In actuality, the 12-tone aspect is more of an incidental texture, and the bulk of the score is written as traditional, dramatic film music (although crafted with a high degree of classical skill).  The werewolf gets a signature 3-note terror-fanfare motif (among other themes).


Trk Dur Title Film Sequence
1 1:49 Prelude Opening credits with eyes of a werewolf, crying (3-note Werewolf fanfare motif surfaces in trumpets/snare).
2 1:59 The Beggar 0:00: (unused) A beggar approaches a church in town and asks why the bells are ringing.
0:42: (partially used) The beggar travels to the Marquis' castle, where a wedding celebration is being held.
3 2:14 Servant Girl and Beggar 0:00: A mute servant girl feeds the imprisoned beggar, who looks hungrily at her. 
0:52: The aged Marquis leers at the servant girl when she enters his room.  He taunts her and tries take advantage of her.  She bites him and runs away. 
1:14: The Marquis has his men lock the servant girl in with the beggar.  The beggar appears, slowly approaches and wrestles her to the ground (also when the beggar is found dead and the guard takes her back to the aged Marquis).
4 2:59 Revenge and Escape 0:00: The Marquis picks at his skin in the mirror.  The servant girl knocks and enters.  She suddenly stabs and kills the Marquis, and then runs out into the forest.  She eventually faints.
1:17: Don Alfredo's servant Theresa realizes that the servant girl they have rescued is mute and feels sympathy for her.
1:39: The servant girl signals that she about to give birth.  As Alfredo lights his pipe, her hears a wolf howl (Werewolf fanfare in muted trumpet) followed by a baby's cry.  Theresa holds the baby to the mother but the servant girl dies.
5 3:43 Baptism 0:00: When the child is baptized, a shadow falls over the window and the baptismal pool ripples strangely.  Lightning flashes and lights up a gargoyle's face (Werewolf fanfare developed).  The baptism is completed.
0:44: Pepe watches over the sheep and hears a wolf howl (Werewolf fanfare in winds, developed).   He shoots and wounds an unseen animal (who is later revealed to be the young Leon).
1:49: Leon tells his father that he dreams that he is a blood-drinking wolf.  Alfredo notices the fur on Leon's palms (Werewolf fanfare in winds, developed).
2:12: The priest tells Alfredo that Leon's werewolf side can be suppressed by pure love.
2:53: A fanged Leon fights to escape his barred window when the full moon is out.  Alfredo puts him to bed.  Meanwhile Pepe shoots a dog who he (wrongly) suspects killed his goat.
6 1:51 Pastoral 0:00: A grown up Leon leaves Alfredo and Theresa to make his own way.
0:35: After a long walk he ends up at a vineyard.
7 1:49 Leon's Assignation 0:00: Cristina returns from an outing and is greeted by her father. 
0:30: She soon sneaks out to have a secret rendezvous with Leon. 
1:29: Her father hears noises and they part.
8 2:22 A Deadly Transformation 0:00: While at a tavern, the full moon makes Leon feel strange (variations of Werewolf motif lead to fanfare).
0:40:  A tavern girl takes him upstairs to comfort him (Werewolf variations).
1:12: Leon gets excitedly amorous.  He bites the tavern girl and then kills her.
2:01: When Leon's friend comes up to investigate, Leon kills him as well.
9 3:28 Leon Confronts the Horror 0:00: Leon flees from the family priest after he learns that he must be chained.  He is stopped by police (Werewolf variations).
0:40: That night Leon fights the moon's effects (string cluster glissandi).  Cristina arrives and he collapses.  The next morning he finds out that her constant company somehow prevented his lupine transformation (Werewolf motif in horns) and he asks her to marry him.  They plan to run away.
10 1:58 Leon Imprisoned 0:00: While in prison, Leon tells Alfredo to get Pepe's silver bullet so that they can kill him before it's too late (Werewolf motif developed in trumpet).  The priest tells a disbelieving Cristina about Leon's lupine affliction.
1:02: Alfredo journeys back to the village to retrieve the silver bullets from Pepe in a race against time, as the sun sets.
11 3:21 Final Transformation 0:00: In the prison cell, Leon begins to change (Werewolf motif in winds).  He tears off his clothes (string glissandi, variations of Werewolf motif).
1:13: Cristina arrives at Alfredo's house.
1:48: A transformed Leon attacks his cell mate.  He breaks out of prison and kills the guard (developed Werewolf motif).
2:22: Theresa comforts Cristina at Alfredo's house.  She tells Theresa that Leon really is a werewolf.
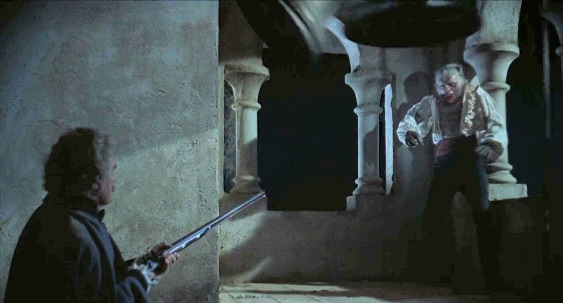
12 6:50 Finale 0:00: The townspeople search for Leon and track him on rooftops.  Cristina races to town to try to save him.  The townspeople try to use fire against Were-Leon, but the Werewolf escapes.  He climbs to the bell tower.
4:05: Alfredo ascends the stairs of the tower with his rifle.
5:06: With Leon distracted by the ringing bells, Alfredo shoots Leon.  He then covers the dead (but still lupine) Leon with his cloak. 
6:21: End credits.


Links
Benjamin Frankel Wiki
CD Sleeve notes
On iTunes
On Spotify
Hammer Film Scores and the Musical Avant-Garde (David Huckvale)

Monday, May 9, 2016

Vertigo (Herrmann, 1958)

     The director-composer relationship between Alfred Hitchcock and Bernard Herrmann is a legendary one and probably reached its zenith in 1958's "Vertigo" (though frankly there are MANY contenders for this title in their joint filmography).  In any case this production showcases a virtually perfect example of how music enriches a film sequence and provides narrative information to the audience even without them knowing about it.

     In this film, a detective, Scottie, finds out that he has a fear of heights.  He is soon hired to follow an old friend's wife, Madeleine, who acts as if she is possessed by an ancestral spirit.  Eventually Scottie falls in love with Madeleine, but she falls to her death, due partially to Scottie's affliction with vertigo.

     After a nervous breakdown, Scottie runs across a woman, Judy, who looks like the dead Madeleine and tries to remake her into the dead woman.  In reality, Judy IS Madeleine, as she had earlier pretended to be Madeleine in order to help Scottie's old friend stage a suicide.  In any case, the main theme of the film is Scottie's obsession with the dead woman and his desire to create a false reflection of her, despite the fact that Judy really IS Madeleine. 


Prelude Structure
     Musically, the Prelude provides a Main Title which is a kind of crystal encapsulation all of the musical motifs which will unfold in the ensuing picture.
  • Intro (Fanfare): Falling/rising triplets in contrary motion on violins/winds/vibraphone with 4 slowly descending brass chords.  This 4-note falling motif (and variations) occurs many times and is a variation of the Love theme ending.
  • A: Contrary motion motif in harp/celeste, with the 4-note motif as isolated brass accents with flute/clarinet/vibraphone/violin triplets.  The 4th accent features Hammond organ.
  • Bridge: Rising violin/flute trills.
  • B: Contrary motion motif and 4-note motif developed in sweeping brass/winds and flute/clarinet/string arpeggios.
  • A': Cascading variation of falling/rising contrary motion motif with 4-note descending brass motif.
  • B: Contrary motion motif and 4-note motif developed in sweeping brass/winds and flute/clarinet/string arpeggios.
  • Coda: Pizzicato variation of  falling/rising motif as coda.
     Herrmann creates several themes from the Prelude by stacking notes or shifting intervals into different shapes, but still maintaining a distinct rising/falling, somewhat "reflective" feeling.
  • Pursuit motif: a churning, compressed version of the Prelude theme as a suspense ostinato, supported by swelling brass, and used on the rooftop and whenever Scottie climbs stairs.
  • Vertigo motif: swirling polychord (derived from Prelude theme) featuring brass and wild harp glissandi, used for when Scottie experiences vertigo.
  • Love theme: a sweeping love theme starting with 3 rising notes going into 4 slow falling notes (the 4-note motif from Prelude).  The 4-note motif is repeated with ornaments and modulated.  The Love theme first appears in "Farewell" when Madeleine briefly hints at her true feelings.  It haunts Scottie in the second half of the picture. 
  • Madeleine theme: slow wandering figure which first appears in the beginning of track 2's "Madeleine", a somewhat melancholy "unfulfilled" version of the Love theme (3 rising, 3 falling, 1 rising and then falling, etc..).  Vertigo is largely made up of many complex Madeleine variations, though in the table below I sometimes just say "Madeleine's theme" for brevity's sake.
  • Carlotta motif: Spanish "habanera" 4-note rhythm on one pitch, usually with a counter figure.
  • Following motif: irregular 6-note rhythm used whenever Scottie spies on Madeleine.

     The below listing is based on the 1996 expanded Varèse Sarabande release of the soundtrack to Vertigo (original recording conducted by Muir Mathieson, partially in mono), though the descriptions below should be handy when listening to the 1995 rerecording by Joel McNeely as well (except for "Scottie Trails Madeleine", which is a slightly different cue ending than the Mathieson recording).  The table below describes the film sequences for each cue and a brief note about the music elements.

     The musical analysis here is admittedly scant for a complex score such as this, and in fact an entire book by David Cooper has been written about this score (which I don't have, unfortunately), as well as innumerable theses and music papers.  Tom Schneller's paper on the Farewell scene is especially interesting and was helpful in identifying a few theme transformations (see link at bottom).  I'm very tempted to write "full analyses" of certain favorite cues (perhaps another day), but suffice to say that each cue is a perfect microcosm of musical drama, and each also serves as a case study in film scoring at its highest level. 

Trk Dur Title Film Sequence
1 4:44 Prelude 0:00: Logos, Titles over woman's face (Intro fanfare, Prelude A).
0:59: Spiral imagery begins (Bridge, Prelude B).
1:44: (Cascading variation: Prelude A').
2:20: Music credits (Prelude B).
2:44: A spiral image settles into woman's eye, director credit (Coda).
Rooftop 2:58: Scottie and a policeman chase a suspect over rooftops. Scottie ends up hanging by his fingertips after an attack of vertigo (Pursuit motif in layers of swirling strings/winds, swelling brass figures).
3:48: A policeman falls to his death when he tries to help Scottie (timpani roll into Vertigo motif (dissonant brass/vibraphone/harp strums, etc), ending in rising brass figure and timpani roll).
2 6:19 Scotty Trails Madeline
(suite of 6 cues)
0:00: Madeleine (Madeleine's 1st Appearance): Scottie is fascinated when he sees Madeleine at Ernie's restaurant (Madeleine theme developed on violins over soft strings, ending on poignant cello figure).
1:16: Madeleine's Car: Scottie follows Madeleine's car (Following rhythmic motif on clarinets/bass clarinets, joined by Madeleine theme developed on violins, then Following rhythm on strings/Madeleine theme on clarinet/oboe, back to Following motif on clarinets/Madeleine on strings).
3:09: Scottie follows Madeleine into a dark building (Following motif in pizz strings and low winds, falling clarinets, strings).
3:50: The Flower Shop: Scottie spies on Madeleine shopping for flowers (yearning Madeleine theme in violins over soft clarinets).
4:25: Alleyway: He returns to his car before Madeleine exits (harp strums and short string figures, clarinet ornaments).  Madeleine gets in her car.
5:02: The Mission: Scottie follows Madeleine as she drives to Mission Dolores.  She enters and he follows (slowly descending organ/wind/string layers).
5:41: Mission Organ: Source music inside the mission, Madeleine exits to the connected graveyard and Scottie follows (church organ theme).
3 1:57 Carlotta's Portrait 0:00: Scottie observes Madeleine at the art gallery sitting in front of a portrait.  He notices that her flowers and hair echo the painting's subject.  He learns that the painting is a "Portrait of Carlotta" (Carlotta motif in harp under slow figures in flutes, clarinets, muted horns, etc., supported by violins/vibraphone).
4 2:59 The Bay 0:00: Scottie follows Madeleine as she drives to the base of the Golden Gate Bridge inside the Presidio (hopeful Madeleine theme variation on viola/celli/horn over harp/violin arpeggio, joined by winds, brass, strings, flute). 
1:00: Madeleine exits her car and drops flowers into the water as Scottie looks on, puzzled (delicate vibraphone with held string textures/wind ornaments).
1:52: Madeleine jumps into the bay (horn/string fanfares with high falling wind figure) and Scottie rushes to retrieve her unconscious, floating form (rising/falling wind/string figures and tremolo strings).  He puts her in his car and drives them both back to his apartment (soft strings variation of Madeleine theme).
5 2:56 By the Fireside 0:00: Scottie leaves Madeleine in his bedroom so she can get dressed (4-note motif as falling suspense violins).
0:20: Madeleine enters the living room in his bathrobe and suspiciously asks Scottie what is going on (Madeleine theme developed on poignant violins).  They discuss her trips to the Presidio (thoughtful variation, hesitantly returning to poignant feeling).
6 2:25 The Streets 0:00: Scottie follows Madeleine's car again and is puzzled by her random path.  She finally ends up at Scottie's own apartment (Following motif in strings with Madeleine theme in winds, strings, winds, ending in a rising falling figure in various instruments).
7 3:48 The Forest 0:00: Scottie and Madeleine walk in an old forest and discuss the past (foreboding 2-note figures as swells in muted brass/bass, rising brass/wind harmony alternating with falling figures).
1:21: Madeleine looks at the rings inside a cut tree trunk and makes strange statements (2-note figure developed into 8-note figure in eerie high winds and muted brass).
"Somewhere in here, I was born, and there I died."
1:58: Madeleine disappears from view behind a tree (throbbing organ/low winds/vibraphone).
2:31: Scottie finds Madeleine in a daze and tries to psychoanalyze her (8-note figure in eerie high winds with organ, low winds, rising falling muted brass harmonies).
3:28: Scottie escorts her out of the forest (resigned cor anglais ending figure).
8 3:31 The Beach 0:00: Scottie and Madeleine talk on a small beach (poignant strings variation of Madeleine theme with horns, bassoon, cor anglais).
0:39: Madeleine describes walking down a dark corridor towards darkness and a lonely room (slowly falling strings in 2 layers with intermittent flute/clarinet chords).
1:38: She describes a graveyard image (swelling trombone/tuba, low clarinets).
2:03: Madeleine describes a dream of a Spanish bell tower with a garden below it (Carlotta motif in violins with flute, clarinet).  She worries that she is going mad (tremolo strings).
2:39: Madeleine runs off and Scottie pursues her (poignant Madeleine winds/strings).  They embrace and then finally kiss as waves break on the rocks behind them (triumphant sweeping Madeleine brass/winds/tremolo strings).
9 2:46 The Dream 0:00: Madeleine visits Scottie and claims to have had another bad dream (poignant Madeleine variation in falling violins).
0:32: Madeleine describes the dream's details.  Scottie tells her that the dream's location is a real Spanish mission (Carlotta motif in violas joined with dialoguing clarinets, strings, flutes, with vibraphone accents).
2:06: Scottie tries to comfort Madeleine and offers to take her to the mission (variation of beginning section: poignant Madeleine variation in falling strings).
10 6:58 Farewell 0:00: Scottie and Madeleine drive down the highway.  Madeleine looks somewhat guilty (reprise of The Bay opening: hopeful Madeleine theme variation on viola/celli/horn over harp/violin arpeggio, joined by winds, brass, strings, flute arpeggios).
0:40: The couple arrive at the Spanish mission, San Juan Batista (Carlotta motif in flute/violins/brass).
1:12: Scottie questions Madeleine as she sits in a carriage in the livery stable.  She talks of her past visions (high falling, rising winds/strings over Carlotta motif in horns/harp accents).
2:33: The two embrace and kiss (strings/winds play Love theme fragments into Madeleine theme (2:41)).
3:16: Madeleine tells Scottie that "It's too late" and runs off (Madeleine theme fragments repeated and transformed).  Scottie catches up with her but she seems torn (Love theme finally achieved, briefly, at 3:58).
"If you lose me, then you'll know I...I loved you and I wanted to go on loving you."
4:05: Madeleine tears herself away from Scottie and enters the mission church (Love theme again twisted into a poignant variation on brass, tremolo strings).
Tower 4:18: Scottie sees the bell tower and chases Madeleine into the church, but finds the main hall empty (Vertigo chords in brass, winds).
4:36: Scottie sees the stairs up to the tower and begins climbing after Madeleine (Pursuit motif in strings/brass intercut with soft Vertigo harmonies in vibraphone/winds/muted brass).  He experiences vertigo attacks but continues climbing (Vertigo motif in brass/harp, brass tremolo accents enter). 
5:15: Madeleine's body falls past him in a window and ends up lifeless on the ground (high winds/brass/harp, percussion crash, brass/timpani roll). 
5:36: A panicked Scottie begins climbing back down the stairs (Vertigo chords in brass, soft brass/wind swells). 
6:06: He exits the church as Madeleine's body is found by church staff (low brass figures). 
6:29: The scene cuts to Scottie's trial (mysterious high string and low wind figures).
11 3:33 The Nightmare 0:00: Scottie visits Madeleine's grave (Love theme in violins, joined by winds).
0:32: Scottie begins to have a bizarre nightmare with images related to Carlotta and her flowers, as well as a necklace (low winds joined by rising tremolo viola and violin figures and Carlotta's motif in horns/strings/tambourine/castanets, etc.).  Scottie approaches an empty grave (Carlotta motif in low brass).
1:34: Scottie's head is seen falling down a tunnel, followed by a falling silhouette (layers of rising string/wind figures, joined by rising horns/tubas, Vertigo brass chords).  Scottie wakes up in a panic (cymbal crash).  He is next seen in a mental institution (low brass).
Dawn 2:03: A despondent Midge leaves the institution (despondent low strings). 
2:27: The camera pans across a beautiful San Francisco morning (hopeful harp/strings/winds).  Scottie waits outside Madeleine's old apartment and sees a woman come out (Love theme on brass, winds).
3:11: He intercepts her at Madeleine's old car and finds out she bought it from Madeleine's husband (soft tremolo strings, rising expectantly and ending with an accent).
12 3:14 The Past 0:00: Scottie visits Ernie's restaurant and imagines seeing Madeleine there (Love theme in strings/winds, Madeleine theme in strings, tremolo string harmonics).
0:52: Scottie visits the art gallery and the flower shop where he followed Madeleine to (Carlotta motif in clarinets with fingerboard-bowed strings, resigned strings). 
The Girl 1:26: Scottie sees Judy Barton, a girl who, though very different, looks slightly similar to Madeleine (Love theme in strings).  He follows her and observes her entering the Empire Hotel (camera pans upwards to her upstairs window) (rising string figure).  He goes into the hotel and slowly approaches her door before knocking (poignant Love/Madeleine theme fragments, Love theme becoming thinner and thinner).
13 4:16 The Letter 0:00: After having secured a date, Scottie leaves Judy's room, and Judy appears upset (subdued falling clarinet harmonies).  She has a flashback to the Spanish church where Scottie chased her (as Madeleine) up the stairs.  At the very top Gavin throws a different body from the tower (Pursuit motif in strings/brass).
0:53: The flashback ends and Judy begins to pack (determined string figure with muted horn accents). 
1:20: She pauses to finger Madeleine's suit dress, and then continues to pack (high wind/harp accent, then softer, less decisive string figures).
1:53: She begins narrating a letter to Scottie ("Dear Scottie.  And so you found me...").  She explains that Scottie was just a tool in Gavin's plot to kill his wife.  She admits that she really did fall in love with him and then wonders if she could make him love her for her true self and not the false Madeleine (subdued figures in growing layers of strings).
3:32: Judy rips the letter up and begins to unpack (accelerating fragment of Madeleine variation string figures with soft horn accents).
14 3:07 Goodnight 0:00: Scottie drives Judy back to the hotel and escorts her to her room (peaceful strings).  He insists on seeing her the next day (Madeleine variation in violins over swelling/tremolo strings).
1:25: Judy sits backlit in a green silhouette which further reminds Scottie of Madeleine (Love theme mixed into Madeleine strings).  She reluctantly acquiesces to Scottie's demands and he departs (falling strings).
The Park 2:24: Scottie and Judy enjoy a beautiful day in the park amidst young lovers (cheerful strings/harp/winds, winds, low strings).
15 5:08 Scene d'Amour 0:00: Scottie impatiently waits in Judy's room for Judy to return from dying her hair blonde (Love theme in subdued high strings, developed).
1:12: Judy appears in the hotel corridor.  In her room, Scottie tries to adjust her hair to be more like Madeleine's (suspenseful flute/clarinet harmonies, Love theme in strings growing stronger).
2:15: Judy goes into the other room to complete her makeover into Madeleine, as Scottie nervously waits by the green-lit apartment window (Love theme fragments in tremolo strings (with ghostly harmonics), slowly forming full Love theme, swell).
3:06: Scottie turns and sees Madeleine emerge out of a green fog.  They embrace and kiss (Love theme in soaring strings/harp, rising variations with brass accents).
3:54: The camera pans around them as the background changes to the Spanish Mission livery stable and then back to the hotel room (Love theme briefly develops into a faster dancing figure, ending in a triumphant variation).
16 7:20 The Necklace 0:00: Scottie notices that Judy's necklace is the same one Madeleine and Carlotta wore (flashback to art gallery) (Carlotta motif in horns/flute with 4-note motif).  Judy kisses Scottie, who starts having suspicious thoughts (soft Love theme string/oboe figures intercut with Carlotta motif).
0:50: Scottie and Judy drive at night (falling brass/winds over tremolo strings).  Judy starts to suspect that they are going to the Spanish church as Scottie talks about "freeing himself from the past" (falling flute ornaments with rising horn figures in dialogue with falling flutes/clarinets).
1:53: They arrive at the Spanish mission (falling strings/horns figure).
The Return 2:11: Scottie exits the car and starts telling Judy about his last moments with Madeleine and her oddly ironic last words.  He slowly drags her into the church and towards the stairs while relaying the story (ominous variation of Farewell sequence: Madeleine theme variation on violas/clarinets, violins/bassoons, Madeleine variation fragments repeated and transformed in tremolo/sweeping strings/winds).
3:45: Scottie makes Judy ascend the stairs so he can "save her" this time (wind/muted horn accents/falling violin pizzicato accents join, Madeleine theme becomes exaggerated with accents, ornaments and tempo swings).  He follows and overcomes his vertigo attacks (Vertigo motif).  He pauses at where he originally stopped the last time (Madeleine theme slowly fades in low strings).
Finale 4:55: Scottie drags Judy up into the bell tower room and then interrogates her about what happened the day "Madeleine" died (tremolo/pizz strings and scalar clarinet ornaments, tremolo suspense strings, quiet clarinets)
"And there was where you made your mistake, Judy.  You shouldn't keep souvenirs of a killing."
5:54: Scottie tells Judy how much she meant to him.  Judy kisses Scottie and professes her true love for him (Love/Madeleine theme developed on strings, winds).
6:39: Judy sees a dark shape rise from the shadows and accidentally falls out the window (Hammond organ drone, pause, low brass/timpani crash).  A Church Sister (the dark shape) begins ringing the tower bell as Scottie stands on the ledge looking downwards (Love theme in brass, end cadence).  


Links
Vertigo score Wiki Entry
Bernard Herrmann Wiki
Bernard Herrmann Society
Bernard Herrmann Society Facebook
Vertigo Film Score Rundown 
Film Score Rundowns Herrmann Page 
Herrmann Film Score Lovers Facebook
Death and Love: Bernard Herrmann's Score for Vertigo (Tom Schneller)

Tuesday, March 1, 2016

Godzilla (Ifukube, 1954)

     Although he has actually scored films of many different types (besides also composing classical concert works), Akira Ifukube is best-known for the scores he wrote for the Godzilla (ゴジラfilm series.  His first Godzilla film was also the first in the series (in 1954), and his last was "Godzilla vs. Destoroyah" (1995), in which Godzilla actually "dies".  In the first film, in addition to providing solemn elegies, military marches and foreboding "rampage" cues, Ifukube also provided some of the sound design for the film, specifically Godzilla's foot steps (kettledrum beaten with a knotted rope) and roars (resin-covered leather glove rubbed over contrabass strings and reverberated).  Even today, the beauty and horror of this film's visuals and music is very effective, with Godzilla's howls being nothing less than horrific and unsettling (the roars on track 9 could probably peel paint at the proper volume, while the Oxygen Destroyer theme on track 10 is nothing to sneeze at either!).

    This first film also lays out the first appearance of the "Godzilla March" (in the Main Title), also sometimes known as the "Godzilla theme".  This march is supported by a constant bass pulse, and begins with a 3-part phrase built from 3-note figures.  The phrase then modulates upwards and develops.  Following a repeat of these first 2 parts (usually with thicker orchestration), a coda wraps things up with a "tail" characterized by syncopated accents.

    The other iconic motif is the "Godzilla Fury" theme (or just the "Godzilla theme"), which appears in a slightly embryonic form in "Fury of Godzilla".  This slow theme has a kind of lurching quality to it, as if an ancient force from a primordial universe was pulling itself out of the depths towards mankind's modern world.  This theme would rear up in its full appearance 8 years later in 1962's "Kong Kong vs Godzilla" ("Godzilla's Resurrection").

     Other motifs such as the odd scalar figure in the beginning of in "Uneasiness on Odo Island" would also crop up in future films, making this a fascinating look at where it all started..

(Tracks below from the Godzilla Perfect Box 1, Disc 1)
Trk Dur Title Sequence
1 2:11 Godzilla Approaches
(Sound FX)
&
Main Title
(M2+M1)
Logo, Credits:
0:00: Giant footsteps, roars.
0:36: Godzilla March (patterns beginning with descending 3-note figures.modulating and with additional high layers joining), ending on syncopated accents.
1:21: Repeat with ending variation.
2 1:10 Ship Music/
Sinking of Eikou-Maru
(M3)
0:00: Sailors play music on the deck of the Eikou-maru.
Source music - guitar/harmonica.
0:21: The boat is attacked and sinks in a flaming ruin, as an SOS is radioed out.
Low, strummed piano strings, churning string/brass figures, rising, ending in tremolo winds/strings over slow, falling brass figure.
3 0:24 Sinking of Bingou-maru
(M4)
The Bingou-Maru explodes and goes down in flames at the same location.
Low, strummed piano strings, tremolo winds/strings over slow falling brass figure (shortened M3).
4 0:51 Uneasiness on
Odo (Otojima) Island
(M5)
0:00: Newspaper headlines about the mysterious naval disasters.
Slow, halting, atonal piano scales.
0:10: Uneasy villagers on the shore of Odo island see a raft floating in.
Falling figure in winds/tremolo strings.
5 1:20 Ritual Music of
Odo Island
(M6)
Source music for Otojima Temple Festival.  A village elder tells of the legendary creature Godzilla.  Since the villagers can no longer sacrifice a girl to the creature, they do a ritual dance of exorcism instead.
Ethnic flutes, gongs, tom toms, harp, oboe, etc.
6 1:54 Storm on
Odo Island
(M7·T1)
During a storm, a hut begins shaking and collapses, as the villagers run around in a panic.  More huts are mysteriously destroyed.
Falling bass figure in brass over tremolo bass, giant footsteps, rising/falling scalar patterns in strings, trumpet, etc.,  then a low falling brass figure hinting at the Godzilla Fury motif, soon rejoined by scalar figures.          
7 0:41 Frigate March 1
(Japanese Army March I)
(M11)
A research vessel is launched to investigate the odd disasters.  Professor Serizawa watches Emiko depart with Prof. Yamane's ship (also used for when depth charges from a frigate squadron are employed to kill Godzilla).
Self Defense Force March: Brass march with intro, 2 choruses, ending cadence.
8 0:34 Odo Island Theme
(M9)
Prof. Yamane's team surveys the damage on Odo Island.
Mournful low brass figure over sustained strings.
9 0:54 Godzilla Appears
on Odo Island
(M10)
The villagers rush up a hill as a sighting of Godzilla is reported.  Godzilla peeks up over the hilltop, scaring Emiko, and then retreats back into the sea.
Giant footsteps, Godzilla roars, no music.
10 0:42 Horror in the
Water Tank
(M13)
After Serizawa puts something in his aquarium, Emiko reacts with horror at what she sees.
Sul ponticello heavy violin bowing, low sustained piano strike.
11 1:49 Shinagawa
Pandemonium
(M14+M7T1)
Godzilla appears in the bay and soldiers open fire; people panic.
Falling figure in low winds, rhythmic low piano pounding with brief Godzilla Fury motif, churning, rising figures over slow pounding footsteps, Godzilla Fury motif returning, churning trumpet figure, finally ending in a brass/timpani cadence.
12 1:27 Attack Godzilla!
(M16)
Armed forces get into position, as Godzilla is sighted at sea heading towards Tokyo and Yokohama (also when Godzilla attacks a second time using his atomic breath, and fire engines rush to put out the flames).
Godzilla March with recap at 0:43 with more gong.
13 1:55 Godzilla Comes Ashore
(M14)
As Yamane and Emiko escape up to a hill, Godzilla comes ashore and destroys a train.  He moves inland and destroys a trestle bridge, and then leaves (also when Godzilla comes ashore a second time, this time with artillery and a high voltage fence waiting for him).
Falling figure in low winds as in T11, rhythmic low piano pounding with slowly rising Godzilla Fury motif in low brass/winds, and then joined by more brass and timpani in "B" section.
14 2:27 Fury of Godzilla
(Godzilla’s Rampage)
(MA')
After destroying the electric fence on his second raid, Godzilla uses his atomic breath to lay waste to the city.
Godzilla Fury theme on low brass over pounding piano/gong, soon joined by trumpets in its "B" section, with recap/coda starting from 1:36.
15 1:14 Deadly Broadcast
(MB)
Reporters broadcast from a tower and take flash photos, attracting Godzilla's attention.  Godzilla knocks down the tower.
Rhythmic strings with accents on brass and low hammered piano. 
16 1:27 Godzilla Comes
to Tokyo Bay
(MC)
Godzilla heads back towards Tokyo Bay, still destroying bridges.
Plodding, low falling piano/bass clarinet figure, soon joined by 2nd wind figure, some Godzilla theme motif elements (rising tail).
17 1:32 Repel Godzilla!
(M1)
Planes attack Godzilla with missiles; he returns to the sea.
Godzilla March from Main Title.
18 2:19 Devastated Tokyo
(M19)
The city lies in ruins, devastated, and many people are seen in hospitals.  Emiko decides to tell her boyfriend Ogata about Serizawa's terrible secret weapon.
Devastation theme: elegiac theme on sad strings/muted brass/winds, somewhat similar to Prayer for Peace; at 0:53, B theme with high winds and crying sounds, with recap from 1:31.
19 3:14 Oxygen Destroyer
(M20)
Emiko has a flashback to when Serizawa demonstrated the Oxygen Destroyer, and all of the aquarium fish turned to skeletons.  Serizawa tells Emiko to keep it a secret until he can find a good use for its awful power.
Sul ponticello heavy violin bowing, low sustained piano strike, low piano pulses joined by sad cello solo, basically M13 extended with a cello solo.
20 3:03 Prayer for Peace Serizawa tells Ogata that the secret of the Oxygen Destroyer is too dangerous as long as he lives.  Meanwhile a "Prayer for Peace" is broadcast on the radio.  The camera pans over the ruined buildings and injured people, as well as a girls choir singing.
Dialogue, then fade in of girls choir Prayer for Peace theme over solemn strings/brass.
21 0:22 Frigate March II
(Japanese Army March II)
(M21)
Another ship is sent out to locate Godzilla under the sea.
Self Defense Force March reprise: 1 chorus.
22 6:24 Godzilla Under the Sea
(M22)
Serizawa and Ogata are lowered into the water with the Oxygen Destroyer.  Godzilla stirs.  Ogata returns to the surface as Serizawa detonates the Oxygen Destroyer.  Serizawa wishes Emiko and Ogata well before he cuts off his own lifeline.  Godzilla dies.
0:00: Devastation theme: elegiac harmony on sad strings, muted brass/winds
0:57: B theme
1:57: B theme with high winds added
2:44: brief noble variation with tremolo strings
4:06: recap with low piano joining
4:26: low, pounding piano rhythm featured over sad strings, eventually incorporating hint of Godzilla Fury motif
23 1:43 Ending
(M23)
Emiko and Ogata mourn Serizawa's sacrifice.  Yamane theorizes that another Godzilla may appear if nuclear testing continues.  The crew salute.
Prayer for Peace on sad strings, winds, muted brass, with female choir joining in.
24 2:10 Bonus Tracks:
Main Title Footsteps & Roars
(M2)
M2 EFX without music.
25 1:51 Storm on Odo Island M7·T1 with Efx and dialogue.
26 1:13 Pleasure Boat Music Source music: A pleasure cruise runs into Godzilla after the depth charges fail to kill him.
27 0:53 Radio Music Source music: Dr. Serizawa listens to the radio after getting rid of a reporter.  Emiko asks him what he's really working on.

     In 1963, Ifukube would return to Godzilla with "King Kong vs. Godzilla"...


Other Akira Ifukube Godzilla Films Analysed:
King Kong vs Godzilla
Mothra vs Godzilla
Ghidorah the Three-Headed Monster

Invasion of Astro Monster
Destroy All Monsters

Links
iTunes Listing
Godzilla Perfect Box 1 at Screen Archives
Filmtracks Review
Akira Ifukube Wiki
Akira Ifukube Museum
Godzilla Monster Music
Toho Kingdom Soundtracks

Thursday, January 21, 2016

The Day The Earth Stood Still (Herrmann, 1951)

     One of my favorite scores of all time, this features some very unique orchestrations as well as various musique concrete tape music techniques such as backwards tape, cutting off the attacks of chords and using reverb content only, etc...  Multitracked overdubs, first explored in Herrmann's score for "The Devil and Daniel Webster" ("All That Money Can Buy") is also used here to create electro-acoustic layers ("Prelude", "The Glowing, "The Prison").  The movie itself is probably one of the greatest science-fiction films ever made, and features an amazingly mature and philosophically-dense script.

     The music begins with the striking sounds of the 2 theremins, which here, along with its central role in Dimitri Tiomkin's "The Thing From Another World" and Herman Stein's "It Came From Outer Space", would cement the theremin as the "sound" of 50's sci-fi.  24 out of 32 cues here feature theremin.  Tiomkin and Stein's scores are both excellent works, but Herrmann's The Day the Earth Stood Still is probably one of the top 10 best film scores of that decade.  In contrast to most film composers before and after, Herrmann was also a composer of concert music, and for this reason his scores tend to musically "push the envelope" (while still in service to the picture).  By leaving out strings and wood winds and mainly featuring electronic instruments with percussion and brass, Herrmann created a unique, trend-setting soundworld far ahead of its time.

Composed June 25, 30 - July 28, 1951 by Bernard Herrmann
Recorded July 30 - August 3, 1951, conducted by Bernard Herrmann (assisted by Lionel Newman and Alfred Newman)
Featuring: Theremin: Sam Hoffman & Paul Shure/Electric Violin: Felix Slatkin

Instrumentation:
  • 2 theremins (high and low)
  • 2 Hammond organs
  • Wurlitzer pipe organ
  • 2 pianos
  • 2 harps 
  • 3 vibraphones
  • percussion (timpani, cymbals, tom tom, marimba, tam-tam, chimes ("Nikto", "Ray motif"), glockenspiel)
  • electric violin, cello and bass
  • "30-odd brass" (very little horn, but added bass and contrabass tubas).  Low brass often appear when Gort is on screen
  • celeste, electric guitar ("Space Control" only)
  • (no acoustic strings or winds)

     The track numbers listed below are from the 20th Century Fox Classic Series release.  Any timings in parentheses represent where a combined cue starts within that track's duration.  The orchestral music was recorded on 2 channels (basically recorded mono with an extra track for "featured" instruments - in other words, 1 "room mike" and 1 "close mike").  The theremins and tape-manipulated overdubs were recorded on additional tracks, which were mixed down in stereo (especially "The Elevator, Magnetic Pull, etc...). 
Trk Title Film Action Musical Features
1 20th Century Fox Fanfare
(Alfred Newman, 1933)
20th Century Fox logo
2 Prelude Fade in on spacescape Falling glissando (including 4 multi-tracked theremins and backwards tape vibraphone swell)
Outer Space (0:07) Title appears as POV (point of view) approaches Earth Pianos/organs/harp ostinati supports alternating and layered theremin motif and brass/organ motifs ("Space motif", ABA'B'A+Coda structure)
Radar (2:06) World reacts as alien space ship is detected on radar ("This is not another flying saucer scare.") Piano/bass and piano/vibraphone duel in ostinato patterns (vibes as accents) ("Radar ostinato figures")
3 Danger   After saucer lands in Washington DC the government reacts ("Get me the Chief of staff.") Brass figures ("Army motif")
4 Klaatu   Klaatu emerges from the saucer ("We have come to visit you in peace and with good will").  When he activates a hand device, a soldier shoots him. Theremin, low brass and organ, foreboding
5 Gort The robot Gort emerges from the saucer and bystanders flee. Theremin and muted low brass ("Gort motif")
The Visor
(and the Ray) (0:43)
Gort's visor opens and his eyebeams disintegrate the soldiers' weapons.  The alien tells Gort to stop ("Gort! Deglet ovroscol!") Piano Radar figures enter, grow and shrink, interrupted by eye-beam "Ray motif" (overdubbed chimes, cymbals and pianos from tape fragment)
The Telescope  (1:46) Klaatu explains that the now-destroyed hand device was "a gift for your President.  With this he could have studied life on the other planets...". Organ and theremin figures featured
6 Escape   Klaatu has disappeared (escaped from) from the hospital and a search is begun. Army motif, Space motif
7 Solar Diamonds   Klaatu askes if his diamonds could be used to pay for movie tickets ("Do you think they'd accept these?" - unused cue, happens after Arlington) Isolated vibraphone chords
8 Arlington   Bobby, a young boy, shows Klaatu his father's grave at Arlington cemetary as they discuss the foolishness of war ("Did all those people die in wars?"). Pastoral, trumpet-led brass ("Memorial motif")
9 Lincoln Memorial   Klaatu and Bobby visit the Lincoln Memorial ("That's the kind of man I'd like to talk to".) Memorial motif developed
10 Nocturne Bobby sees Klaatu sneak out of the house and follows him to the saucer. 5/4 meter: High organ figures over brass, then low harp figures, etc
The Flashlight (2:22) Klaatu signals Gort with a flashlight. Theremins over electric cello and bass
The Robot (3:10) Gort knocks out the guards and Klaatu enters his ship.  Bobby panics and flees. Timpani glissandi and low brass, overdubbed Ray motif sting
Space Control (4:53) Klaatu enters a control room in the saucer and recites verbal instructions in an alien language. Theremin over high melodic ostinato patterns (vibr, celeste, piano, harp, electric guitar, etc…)
11 The Elevator Klaatu and Bobby's mother, Mrs. Benson, speak in an elevator but suddenly power goes out all over the world ("We shall be here for a little while.  About 30 minutes.") Theremin, organ and brass swells, mixed with multi-tracked reverb "tails" of vibr./chimes/cymbal/piano tape samples
Magnetic Pull (0:30) Electricity is neutralized all over the world in a montage. Tubas and el. bass enter, add'l organ, reverb tails continue (panned backwards tape effects create swells and cut offs)
The Study (2:09) Professor Barnhardt reacts in his study to Klaatu's demonstration of power. Vibraphone enters, reverb tails end
The Conference (2:48) The government discusses the power outage. Theremin, brass and piano ostinato duel (Radar figures)
The Jewelry Store (3:16) Mrs. Benson's boyfriend brings Klaatu's diamonds to the jewelry store to be examined.  Organ, vibr., trumpets.
"12:30" (3:55) As power returns, Klaatu explains to Mrs Benson that he will meet with the scientists of the world that evening. Theremin, organ and brass swells, reverb tails
12 Panic   The hunt for Klaatu is escalated. Space motif with organ featured and less theremin
13 The Glowing After the army has shot Klaatu dead, Gort begins glowing and melts away a glass encasement which was placed around him by the army, and begins killing off guards. Throbbing low organ/cymbal rolls leads to development of Gort motif (low theremins, timpani, organs, brass).  Multi-tracked backwards overdubs (Ray motif).
Alone (1:02) Mrs. Benson approaches the saucer alone. Timpani and theremin (and tam-tam)
Gort's Rage (1:59) Gort threatens Mrs. Benson as she screams. Gort motif on snarling brass and whining theremin
Nikto (2:38) Mrs. Benson gives to Gort Klaatu's final instruction ("Gort! Klaatu barada nikto"). Muted brass and theremin over Radar figures. (reprise of "The Visor")
The Captive (3:00) Gort brings Mrs. Benson into the saucer. Low figures with theremin on top
Terror (3:31) Gort locks Mrs. Benson inside the saucer control room. Subdued organ with muted brass/theremin ornaments, el. violin solo, etc… (changing orchestrations on stable figures)
14 The Prison   Gort melts a prison wall to retrieve Klaatu.  Soon, back at the saucer, he begins treating the seemingly dead alien. Gort and Ray motifs (multi-tracked overdubs).
15 Rebirth   Klaatus is revived and is greeted by an amazed Mrs. Benson. ("I thought you were…", "I was.") Organ and brass chords becomes el. violin, theremins as Klaatu revives
16 Departure   Gort emerges from the saucer followed by Klaatu and Mrs. Benson.  Klaatu makes a final ultimatum to the scientists and military surrounding the saucer.  He explains that his people have created a race of robots like Gort to destroy anyone who shows aggression.  ("Join us and live in peace, or pursue your present course and face obliteration. We shall be waiting for your answer.") Organ featured with theremin, vibr. and brass ornaments (reprise of "Klaatu" w add'l tubas)
17 Farewell   Klaatu signals Gort that they are leaving ("Gort! Baringa.") and waves goodbye to Mrs. Benson. Memorial motif
18 Finale   The saucer recedes into outer space. Outer Space reprise, ending on a major chord cadence ("hopeful")

     This film score exists in several recorded editions.  The 1993 20th Century Fox Classic Series release has 18 tracks (as above).  A limited edition was also released with extra bonus tracks ansd studio outtakes.  In 2004 a remastered version was released as part of the Bernard Herrmann at 20th Century Fox box set (with more noise reduction and slightly different stereo placement of the overlay tracks).  In 2015 Kritzerland released a 2nd remaster (pretty close to the Fox box remaster but with slightly more bass).  The 2004 and 2015 CDs both have the bonus tracks (22 tracks).  In 2003 Joel McNeely re-recorded the score (in true stereo) with a 30-piece orchestra and Celia Sheen on theremin.  All of these releases are worthy of getting.

Links
1993 20th Century Fox Classic Series release
2015 Kritzerland release
2003 McNeely rerecording (Varese Sarabande)
Wiki entry
Bill Wrobel Film Score Rundown (PDF)
Waging the Peace: Bernard Herrmann and The Day the Earth Stood Still (Anthony J. Bushard) 
Bernard Herrmann as Musical Colorist: A Musicodramatic Analysis of The Day the Earth Stood Still (E. Todd Flegel) 

Bernard Herrmann Wiki
Bernard Herrmann Society
Bernard Herrmann Society Facebook
Film Score Rundowns Herrmann Page 
Herrmann Film Score Lovers Facebook