Showing posts with label 1960s. Show all posts

Friday, October 21, 2016

Torn Curtain (Herrmann, Addison, 1966)


     The film Torn Curtain has the notorious reputation of being the film which shattered the collaborative partnership between Alfred Hitchcock and Bernard Herrmann.  In short, Herrmann disregarded Hitchcock's wishes and Hitchcock fired him (full story here).  The film was eventually scored by John Addison with a much lighter touch.  Fortunately Herrmann's original score has been recorded a few times (Elmer Bernstein's recording notably being the first), with the most recent being the Varese Sarabande rerecording conducted by Joel McNeely.  With a little bit of guesswork, it's fairly easy to place Herrmann's unused cues into the film sequences for which they were written and in the analysis below I've included time codes for placement of the McNeely-conducted tracks.  Not to demean Addison's score, but by watching the film and cueing up the Herrmann McNeely tracks at the indicated times, the film has a much more "classic" Hitchcock feel.

     Plot-wise, a scientist (Michael Armstrong) is on his way to a science conference when he announces to his fiancee Sarah that he must abandon the conference and take a side trip.  She follows him and they end up in East Germany, behind the Iron Curtain.  The scientist "defects" with a public announcement, but in reality is in Germany only to spy on a fellow scientist.  The film's midpoint climax comes when Michael is forced to kill his German "handler" Gromek with his bare hands (unscored in the final film, Herrmann apparently originally wrote suspenseful textures for the later stages of the fight climax).  Eventually, the German authorities discover the subterfuge and Michael and Sarah must race to escape from behind the Iron Curtain, with the help of an "underground" rebel bus line organized by the "Pi" resistance group.


Start Time Trk Title Film Sequence
0:00 1 Prelude Main title over ghostly suspense headshots and colorful skies, dissolve to ship in Norway.
2:00 2 The Ship (Cue from appearance of "OSTERFJORD, NORWAY" title) 
Passengers on the ship suffer from the cold temperature.
6:03 3 The Radiogram (Cue from opening cabin door) 
Michael receives a mysterious message.  Downstairs he writes a reply while dodging Manfred, a German scientist.
8:09 4 The Hotel (Cue from overhead street shot) 
The couple arrive at the Copenhagen hotel and get comfortable in their rooms.  Sarah picks up a phone call for Michael from a bookstore.
9:03 5 The Phone (Cue after "Michael, it's some bookshop for you")
The phone call is cut off.  Michael tells Sarah to take a stroll without him.  The bookstore calls back and Sarah gets the address.  She goes downstairs and is accosted by Manfred.  She tries to get directions to the bookstore but has language difficulties.
11:15 6 The Bookstore (Cue from Manfred taking the note from Sarah)
Manfred appears and accompanies Sarah to the bookstore.  She receives the book with a warning and then returns to Michael.
13:52 7 The Book (Cue from Sarah seeing Michael getting documents from the hotel desk clerk)
In the bathroom stall, the book reveals a clue to Michael's next contact - "Pi".
15:36 8 Valse Lente (Cue from wide shot of outdoor cafe)
Source music: The couple have a meal and Sarah asks Michael why he's being secretive.  Michael tells her that he has to go to Stockholm on a special mission.  Michael refuses to have her accompany him to Stockholm.
18:23 9 The Travel Desk (Cue from Sarah going through the revolving hotel lobby door)
At the somewhat inattentive travel desk, Sarah finds out Michael is flying to East Berlin, not Stockholm.
20:28 10 The Blurring (Cue from "Hello, Michael")
Michael sees Sarah on the plane and tells her that she has to go back as soon as they land.
32:28 11 Hotel Berlin (Cue from wide shot of Michael's German escort cars approaching the Berlin Hotel)
The entourage arrives at their Iron Curtain hotel.  Michael quietly visits Sarah's room to try to explain why he is defecting.
34:37 12 Sarah (Cue from "Michael, take me home")
Sarah and Michael talk, and Sarah is still stunned at the turn of events.
35:43 13 Dawn (Cue from morning fade in)
In the morning Sarah wakes up alone, and receives a visit from Manfred.
36:59 14 Gromek (Cue from Michael exiting from elevator)
Michael sneaks out of the hotel, and Gromek follows.  Michael takes a bus to the Berlin Museum.
40:25 15 The Farmhouse (Cue from Michael leaving through the Museum's back door)
Michael takes a cab to the farmhouse.  When a woman opens the door, Michael scratches the "Pi" symbol in the dirt with his foot.  She has Michael go towards a man on a tractor.
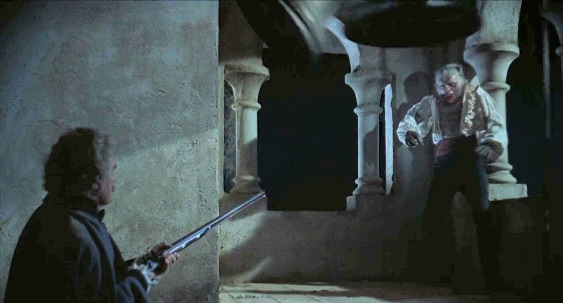
49:32 16 The Killing (The farm woman's knife breaks off in Gromek's shoulder)
As Gromek wrestles with Michael in the farmhouse, the woman stabs Gromek.  Gromek fights on and tries to strangle Michael.  They drag him to the oven and asphyxiate him.
52:24 17 The Body (Cue from shortly before Michael gets up from the oven of death)
Michael and the woman recover from the fight and discuss the disposing of Gromek's body.  They notice the cab driver outside.
55:10 18 The Street (Cue from Michael on the street)
Michael is met by security agents on the way back to the hotel.  He is driven to Gerhardt's office.
56:39 19 The Toast ("Miss Sherman, may I offer you a cognac?")
Everyone has drinks in Gerhardt's office to celebrate Sarah's decision to stay in Germany with Michael.  Gromek is reported missing.

20 The Photos (Unused scene)

21 The Sausage (Unused scene)
59:20 22 The Fall Michael is tripped by a woman (Koska) who is his contact for escape.
1:03:09 23 The Cab Driver (Cue from tight shot of Gromek notice)
The cab driver realizes that Gromek is missing and reports to the police.
1:10:33 24 The Hill (Cue from medium shot of torn Michael as Manfred talks to Sarah)
Michael tells Sarah the truth about his mission.
1:12:44 25 The Search (Cue directly after kissing scene)
Police search the farmhouse.
1:19:42 26 Discovery (Cue with digging sequence)
Gromek's motorcycle and body are found.  Security forces approach the hospital where Koska and Sarah wait for Michael.
1:20:44 27 The Blackboard (Cue from Michael and Professor Lindt walking in the corridor, "I wonder what happened to our security man?")
Michael and Professor Lindt discuss weapons tech and enter Lindt's workroom.  Lindt erases the blackboard and gives the chalk to Michael.
1:26:37 28 The Formula (Michael says "Ah..." after Lindt slams down the chalk)
Michael works at the blackboard and tricks Lindt into revealing his secret formula.
1:28:00 29 The Corridor (Cue from bustling corridor shot)
Michael evades the guards at Lindt's school.  He meets Koska and Sarah and they prepare to escape.
1:29:30 30 The Bicycles Michael and Sarah bicycle to the rendezvous.  They board the PI escape bus and are disguised.
1:32:44 31 The Bus (Cue from the Pi leader seeing the roadblock through the front windshield)
The Pi bus is stopped and searched by a guard.  Their helper Jacobi successfully hides Michael and Sarah.  (This is kind of a guess, but seems to fit)


John Addison score:
1 Main Title Main title over ghostly suspense headshots and colorful skies, dissolve to ship in Norway.
2 Love Theme Michael and Sarah in bed on the ship, and when they arrive at the hotel.
3 Behind The Curtain Sarah is rebuffed by Michael at dinner, and soon finds out that Michael is secretly going behind the Iron Curtain.
4 Introduction To Pi Michael receives the secret message from Pi in the book.
5 Premonitions Of Trouble Variations of suspense music used throughout.
6 Variations On The Love Theme
7 Bus Theme Variations
8 Sarah Alone Paul speaks to Sarah alone after the press conference.  Sarah asks to be taken home.
9 The Murder Of Gromek The cab driver realizes that Gromek is missing and reports to the police.  The police investigate the farmhouse.
10 Michael And Sarah, Alone Of The Hill Michael tells Sarah the truth about his mission.
11 Escape On The Pi Bus Michael and Sarah board the Pi bus.  They encounter a roadblock inspection, bandits, and eventually get escorted by soldiers.
12 End Title The escape basket reveals its empty contents (Michael and Sarah have already escaped).


Links
Talk on the Wild Side, Elmer Bernstein remembers his friend Bernard Herrmann (2003)
Herrmann and Hitchcock, The Torn Curtain (Steve Vertlieb, 2002)

Friday, July 8, 2016

The Prisoner (Frankel, 1955), The Curse of the Werewolf (Frankel, 1961)

The Prisoner
     The 1955 film, "The Prisoner" stars Alec Guinness as an imprisoned Cardinal who is psychologically manipulated by a political "Interrogator" (once an old comrade) into making a confession denouncing his own religion.  It's based on a play, but the film version features a fascinating score by the film and concert composer Benjamin Frankel.  The score was rerecorded by the Royal Liverpool Philharmonic Orchestra under the baton of Carl Davis and included on the 2006 Naxos disc, "Curse of the Werewolf And Other Film Music".


Themes
     The Prelude features a theme developed from a 2-note rising motif (Cardinal theme) which is threaded throughout the score.  The Interrogator gets a 6-note theme which falls in the first 4 notes, then rises and falls briefly near the end.  "Herrmann-esque" wind/harp/percussion ostinati also help impart the "imprisonment" atmosphere "(ex, "Cat and Mouse", "Solitary Confinement").  Some episodes feature music of a more martial nature, to represent the political turmoil resulting from the Cardinal's unfair treatment ("Civil Unrest").  Much of the music has an almost operatic or tone-poem feel to it, reflecting Frankel's background in concert composition.


Trk Dur Title Film Sequence
15 1:28 Prelude Main titles (Cardinal theme with 2-note rising motif developed in strings with supporting brass/timpani, fateful brass/oscillating wind figures, snare/brass fanfares into foreboding brass/bass drum dirge, ending in pensive strings).
16 2:53 The Prison 0:00: The Cardinal arrives at the prison and enters its gates.
0:18: The Cardinal arrives at an audience with the Interrogator, a former comrade (6-note Interrogator theme, timpani).
0:42: The Cardinal is shown to his prison cell and finds that the light fixture is permanently on.  The constant light eventually begins to bother him (tic-toc strings/vibraphone interrupted by brass sting).  He sits and crosses himself.
2:38: (unused) The food slot opens and closes a few times.  The guard enters and wakes him (pizz strings, brass, etc).
17 2:51 Cat and Mouse 0:00: The Interrogator prepares his interrogation room with bright light (Interrogator theme).
0:50: The Cardinal enters and they banter (Interrogator theme in strings dialogue against Cardinal rising motif in winds).  They discuss torture, and the Interrogator tells the Cardinal that instead, he hopes to convert him (Interrogator theme in winds, vibraphone/strings).  The Cardinal says that the idea of torture did not bother him, but that now he is afraid (Interrogator theme in vibraphone).
18 3:06 Cardinal and Interrogator 0:00: The Cardinal is blinded by light, as the Interrogator continues to press his efforts.  He compares himself to a doctor and the Cardinal as his patient (Interrogator theme in strings, harp, vibraphone).  The Cardinal calls on God's help.
1:40: A montage follows of bright lights, tape recordings, marching and interrogations (Cardinal motif in a reprise of Prelude material).  
19 1:52 Mind Games 0:00: The Interrogator finds the Cardinal dozed off and gently wakes him.  They talk about how the Cardinal found his calling in the church. 
1:36: The Interrogator tells him that he sounds tired and afraid of himself (while sketching a man inside a spider's web) (4-note ostinato).
20 3:16 Civil Unrest 0:00: Troops are sent out to settle civil unrest due to the Cardinal's arrest.
0:17: A girl is warned that protest newspapers have been banned.  Her beau, a prison guard, arrives.
0:42: The girl asks her boyfriend to leave his job behind.  They argue about the Cardinal's imprisonment.
2:07: Policemen arrive and arrest a protest journalist (piano chords, martial fanfares).  More violence erupts on the street.  A youth is shot for graffiti.
21 6:30 Solitary Confinement 0:00: (unused) The Interrogator tries to use the Cardinal's ill mother as blackmail to force him to cooperate (I think) (Interrogator theme in strings, wavering vibraphone).
1:13: (unused) The Cardinal is placed in solitary confinement.
2:19: The Interrogator prepares to observe the Cardinal during his solitary confinement indefinitely.  He begins to play a chess game (4-note ostinato developed in vibraphone, harp, timpani).
4:06: (unused) The Cardinal practices math tables but is disturbed by noises.  He begins to be disturbed when he loses his sense of time passing (4-note ostinato joined by Interrogator theme developed in strings/winds). The guard tells him that the light switch now works, but that he will probably be too afraid of the dark to turn off the lights.
22 1:48 The Dark 0:00: The Cardinal turns off the light and tries to relax (tic-toc figures leading to quote of "Dies Irae" in low winds).
0:50: He becomes disturbed (string clusters, brass/drum accents).  He turns on the light and prays to the Heavens for help.  He asks to speak to the Interrogator and begins babbling.
23 3:32 The Confession 0:00: During the Cardinal's forced public confession, he hears an unseen voice echoing the brainwashing arguments (layers of string/vibraphone figures derived from Interrogator motif).
0:35: The Cardinal falls to the ground and throws himself on the mercy of God after he completes his confession (Cardinal theme in brass).  Later, the court prays silently by candlelight for the Cardinal's sentencing, and the Interrogator looks at the somber audience with mixed emotions (brief Cardinal motif in trumpet).
1:36: He walks the riverside and reaches a fish market, which reminds him of his youthful relationship with the Cardinal (leads to rising, building figures).
2:55: A newspaper proclaims the Interrogator as a hero, and the Interrogator crushes it in anger.  He comes across graffiti of a hung Cardinal.
3:19: The Cardinal prays for madness in his jail cell.
24 1:51 Last Meal 0:00: The Interrogator's assistant tells him not to become squeamish before the verdict (Cardinal motif).  The Cardinal is sentenced to death.  His last meal is wheeled to him.
0:26: The Cardinal (now released) tells the guard not to judge the priesthood by the priest (Cardinal motif developed in strings).  He walks free of his cell, as the Interrogator now faces an investigation in a prison of his own making (snare/brass/wind figures).  The Interrogator toys with his gun and then looks out the window as the Cardinal leaves to face a crowd of silent people.
25 1:23 Finale The Cardinal walks away from the prison gate, as the silent crowd parts before him (Cardinal motif developed in strings).  He walks off alone.  End title.


The Curse of the Wolfman
     The Naxos release described above also included most of the score from "The Curse of the Werewolf", a soundtrack which is reputedly one of the first "12-tone" film scores.  In actuality, the 12-tone aspect is more of an incidental texture, and the bulk of the score is written as traditional, dramatic film music (although crafted with a high degree of classical skill).  The werewolf gets a signature 3-note terror-fanfare motif (among other themes).


Trk Dur Title Film Sequence
1 1:49 Prelude Opening credits with eyes of a werewolf, crying (3-note Werewolf fanfare motif surfaces in trumpets/snare).
2 1:59 The Beggar 0:00: (unused) A beggar approaches a church in town and asks why the bells are ringing.
0:42: (partially used) The beggar travels to the Marquis' castle, where a wedding celebration is being held.
3 2:14 Servant Girl and Beggar 0:00: A mute servant girl feeds the imprisoned beggar, who looks hungrily at her. 
0:52: The aged Marquis leers at the servant girl when she enters his room.  He taunts her and tries take advantage of her.  She bites him and runs away. 
1:14: The Marquis has his men lock the servant girl in with the beggar.  The beggar appears, slowly approaches and wrestles her to the ground (also when the beggar is found dead and the guard takes her back to the aged Marquis).
4 2:59 Revenge and Escape 0:00: The Marquis picks at his skin in the mirror.  The servant girl knocks and enters.  She suddenly stabs and kills the Marquis, and then runs out into the forest.  She eventually faints.
1:17: Don Alfredo's servant Theresa realizes that the servant girl they have rescued is mute and feels sympathy for her.
1:39: The servant girl signals that she about to give birth.  As Alfredo lights his pipe, her hears a wolf howl (Werewolf fanfare in muted trumpet) followed by a baby's cry.  Theresa holds the baby to the mother but the servant girl dies.
5 3:43 Baptism 0:00: When the child is baptized, a shadow falls over the window and the baptismal pool ripples strangely.  Lightning flashes and lights up a gargoyle's face (Werewolf fanfare developed).  The baptism is completed.
0:44: Pepe watches over the sheep and hears a wolf howl (Werewolf fanfare in winds, developed).   He shoots and wounds an unseen animal (who is later revealed to be the young Leon).
1:49: Leon tells his father that he dreams that he is a blood-drinking wolf.  Alfredo notices the fur on Leon's palms (Werewolf fanfare in winds, developed).
2:12: The priest tells Alfredo that Leon's werewolf side can be suppressed by pure love.
2:53: A fanged Leon fights to escape his barred window when the full moon is out.  Alfredo puts him to bed.  Meanwhile Pepe shoots a dog who he (wrongly) suspects killed his goat.
6 1:51 Pastoral 0:00: A grown up Leon leaves Alfredo and Theresa to make his own way.
0:35: After a long walk he ends up at a vineyard.
7 1:49 Leon's Assignation 0:00: Cristina returns from an outing and is greeted by her father. 
0:30: She soon sneaks out to have a secret rendezvous with Leon. 
1:29: Her father hears noises and they part.
8 2:22 A Deadly Transformation 0:00: While at a tavern, the full moon makes Leon feel strange (variations of Werewolf motif lead to fanfare).
0:40:  A tavern girl takes him upstairs to comfort him (Werewolf variations).
1:12: Leon gets excitedly amorous.  He bites the tavern girl and then kills her.
2:01: When Leon's friend comes up to investigate, Leon kills him as well.
9 3:28 Leon Confronts the Horror 0:00: Leon flees from the family priest after he learns that he must be chained.  He is stopped by police (Werewolf variations).
0:40: That night Leon fights the moon's effects (string cluster glissandi).  Cristina arrives and he collapses.  The next morning he finds out that her constant company somehow prevented his lupine transformation (Werewolf motif in horns) and he asks her to marry him.  They plan to run away.
10 1:58 Leon Imprisoned 0:00: While in prison, Leon tells Alfredo to get Pepe's silver bullet so that they can kill him before it's too late (Werewolf motif developed in trumpet).  The priest tells a disbelieving Cristina about Leon's lupine affliction.
1:02: Alfredo journeys back to the village to retrieve the silver bullets from Pepe in a race against time, as the sun sets.
11 3:21 Final Transformation 0:00: In the prison cell, Leon begins to change (Werewolf motif in winds).  He tears off his clothes (string glissandi, variations of Werewolf motif).
1:13: Cristina arrives at Alfredo's house.
1:48: A transformed Leon attacks his cell mate.  He breaks out of prison and kills the guard (developed Werewolf motif).
2:22: Theresa comforts Cristina at Alfredo's house.  She tells Theresa that Leon really is a werewolf.
12 6:50 Finale 0:00: The townspeople search for Leon and track him on rooftops.  Cristina races to town to try to save him.  The townspeople try to use fire against Were-Leon, but the Werewolf escapes.  He climbs to the bell tower.
4:05: Alfredo ascends the stairs of the tower with his rifle.
5:06: With Leon distracted by the ringing bells, Alfredo shoots Leon.  He then covers the dead (but still lupine) Leon with his cloak. 
6:21: End credits.


Links
Benjamin Frankel Wiki
CD Sleeve notes
On iTunes
On Spotify
Hammer Film Scores and the Musical Avant-Garde (David Huckvale)

Friday, May 13, 2016

Star Trek, The Original Series: Pt. 2 (Courage, 1965)

     For fans of the original Star Trek television series, the background music is as familiar as Kirk, Spock and Bones themselves.  It's hard to over-emphasize how much the score successfully created the "vibe" of classic Trek, giving it a rich selection of adventurous and romantic themes to pit against more other-worldly scales, timbres and harmonies.  During its run, several major television composers worked on the program, but the first was Alexander Courage who, besides composing the iconic theme song, set the tone and tonal parameters for the entire series.

     Lala-Land's "Star Trek: The Original Series Soundtrack Collection" includes every bit of music from the entire series.  The track listings below are from the 2nd disc in this box set (of 15), which covers the 1st-aired episode, "The Man Trap", and the iconic episode "The Naked Time", both scored by Alexander Courage and building on thematic material he created in the previous episodes he scored.

 
2.1: Alexander Courage: The Man Trap
     The score for this episode features the Captain's theme (4-note rising fanfare) for Kirk, the exotic Nancy theme (variations on a 3-note rising motif) for the "salt vampire", falling muted brass ornaments for Dr. Crater, and slow electric organ textures for the alien surface.  Nancy's theme is most strikingly presented when it is played on electric violin and cymbal rolls.  Her theme also has some falling ornamental wind figures at times.  The eerie use of electric violin in this episode extends to the Star Trek main title theme.
Trk Dur Title Sequence
1 0:55 Main Title (electric violin version)
2 3:29 Small Planet Visit 0:00: Kirk voice-over as the Enterprise orbits a planet with Spock in command.  Kirk and McCoy beam down (Captain's theme in brass, falling muted brass). 
0:43: Kirk teases McCoy about his old flame, Nancy, who they are visiting (Captain's theme in various winds).  They discover an empty home (Low winds).
The Changeling 1:22: A young Nancy appears and greets McCoy (Nancy theme in electric violin).  However she appears elderly to Kirk (Nancy theme in oboe).
1:59: She also looks like a girl from a pleasure planet to crewman Darnell (Nancy theme in sax).  Kirk teases McCoy about his nickname, Plum (Nancy theme in oboe). 
2:57: When Nancy leaves to get her husband, she lures Darnell away from his post (Nancy theme in sax).
3 1:01 Episode Titles 0:00: Kirk voice-over, as Dr. Crater arrives and caustically greets Kirk and McCoy.
Genuine Affection 0:35: McCoy is puzzled when Kirk mentions Nancy's grey hairs.  Dr. Crater is pleased that McCoy still cares for his wife.
4 1:54 First Goner 0:00: A scream brings the men outside where they find Nancy standing over a dead Darnell (brass accents based on Nancy theme, Nancy theme on el. violin, oboe, synth, etc).
Salty Cat 0:51: McCoy is puzzled that Nancy now looks elderly.  Nancy asks about salt tablets as Kirk orders a return to the ship.
1:27: Back on the bridge, Mr. Spock criticizes Uhura's work.
Dressing Down 1:44: Kirk yells at Bones for worrying about Nancy's changing appearance when a crewman is dead.
5 3:18 Circle One 0:00: The Enterprise circles the planet, Kirk is seen on the bridge (with voice-over).
Monitor Gizzard 0:25: Kirk is called to sickbay by McCoy, who is puzzled by monitor readings.  
Down Again 0:38: Kirk orders a return visit to the planet.  Dr. Crater is irritated.
Grey to Greene 0:51: (Mostly unused, features electric organ) Outside, Nancy hovers over a dead crewman.  Crater tries to lure  Nancy to him with salt.  Kirk and McCoy find the body.  Nancy transforms into the identity of another dead crewman (Greene).  Kirk orders everyone back to the ship.
6 1:35 Salt Chaser 0:00: (Partially used) On the Enterprise, Greene follows the smell of salt on Yeoman Rand's dinner tray (Nancy theme on el. organ over cymbal rolls).
7 1:08 Noisy Plant 0:00: (Partially used) Greene follows the smell to Sulu's greenhouse.  He hovers over Sulu's tray when a plant starst making noises.
8 2:54 At First Sight 0:00: Greene sees Uhura and transforms into a black man.  The man flirts with her, but then begins making threatening gestures.  Sulu and Rand arrive and break the spell.  McCoy lies down in his quarters.
Pill Tosser 2:20: McCoy considers taking a sleeping pill.  The black man wanders the corridors looking desperate.
9 1:56 Nancy Schmancy 0:00: (Partially used) The black man changes back to the elderly Nancy, and she visits McCoy in his quarters.  She flirts with him and urges him to take the sleeping pills.
1:32: Sula and Rand discover another victim.
10 2:03 The Unreal McCoy 0:00: Captain's log.  Nancy comforts McCoy as he drifts off (Nancy's theme featured in electric violin over electric organ textures).  Nancy transforms into McCoy.
1:37: Captain's log, Kirk and Spock beam back to the planet surface.  Dr. Crater tries to scare them off.
11 4:05 Top Security 0:00: Kirk is informed of more crew deaths.  Spock finds Greene's body.  Kirk is puzzled and alerts Sulu of a possible intruder.
Lazer Dazer 0:56: Crater opens fire on Kirk and Spock.  They get under cover.
1:47: McCoy visits the bridge and asks about the "creature".
2:41: Back on the planet, Kirk and Spock manage to flank Crater and stun him.  He begins talking about the creature as the "last of its kind".
Dodo Girl 3:54: Kirk alerts the ship that an intruder is aboard.
12 4:50 Conference 0:00: (Partially used) Captain's log.  Security teams report (Hero motif).  Kirk has a conference with his bridge crew to gather information.  The fake McCoy recommends patience and Crater suspects its true identity (Nancy's theme developed on cello).  Kirk interrogates Crater who resists helping to destroy the creature.
4:24: Kirk finds out that Spock was knocked out by the fake McCoy and visits him in sickbay.
13 4:16 Dead Crater 0:00: Kirk finds a dead Dr. Crater.  Spock reasons that he survived due to his alien biology.
Last of the Last 0:11: The fake McCoy returns to McCoy's quarters and wakes him up after transforming back to Nancy.
0:33: (Partially used) Kirk arrives, armed and accusing Nancy of being a killer.  McCoy is disbelieving but Kirk lures it with salt tablets.
1:37: Nancy grabs the salt tablets and holds Kirk mesmerized.  Spock arrives and fights Nancy to no effect.  McCoy is puzzled at her great strength.
2:34: Nancy returns to Kirk and transforms into its natural "alien" state just as it starts killing the captain.  McCoy finally shoots it.  It changes back to Nancy one more time begging for mercy.  McCoy shoots again and kills it. 
3:59: The ship is seen preparing to leave orbit.
14 0:48 Warp One 0:00: (Partially used) Kirk orders the Enterprise to leave orbit.
15 1:09 Trailer
('The Man Trap')
Trailer montage (falling brass, Nancy theme on electric violin, Captain's theme on trumpet and flute, rising brass fanfare).


2.2: Alexander Courage: The Naked Time
     This episode features many different dramatic thematic ideas, but one motif which occurs often is the rising zig-zag flute/clarinet motif (2-note falling accents which rise when repeated), which more or less represents "infection".  Riley gets a kind of "Irish" theme, while Sulu is joined by a swashbuckling fanfare during his fencing episodes.  The concept of "unattainable love" is expressed in various cello figures.  The episode ends with the iconic Hero motif developed in "The Big Go", as well as the memorable trumpet ostinato in "Time Reverse".
Trk Dur Title Sequence
16 3:00 Brass Monkeys 0:00: Captain's log, the Enterprise orbits a blue planet (Trek theme in brass, glockenspiel). 
0:22: Spock and a crewman (Joe) beam down to find frozen occupants, with one strangled (brass fanfare, rising winds/eerie high harmonies, falling accents).
Out of Glove 1:28: Spock and Joe explore further (rising wind figures, col legno strings).  Joe takes off his glove to scratch his nose and is infected by an alien substance (rising zig-zag Infection motif in flute).  Unaware, Spock reports to Kirk (swelling cadence).
17 1:23 Breaking Planet 0:00: Captain's log (Trek theme), Kirk is puzzled by the mystery (Captain's theme), the away team beams back.
Sweaty Palm 0:33: Joe rubs his palm strangely and acts emotional in front of the captain (rising zig-zag Infection motif in clarinets with Captain's theme in brass, oboe).
Itchy Hand 1:04: Joe rubs his hand some more (zig-zag Infection motif continues, etc).  Kirk reviews tapes.
18 3:04 Joe Berserk 0:00: In the cafeteria, Joe begins a meal still playing with his hand.  He is joined by Sulu and Riley.  Joe is irritable.
1:20: Joe gets up and becomes heated (muted brass accents).
2:05: Joe starts to threaten himself with a dinner knife.  Sulu and Riley struggle with Joe until he falls to the ground injured.  Riley calls security but gets an "itchy" hand.
19 1:15 Pulled Down 0:00: The Enterprise bridge crew compensate for gravity disturbances from the planet below.
It Spreads 0:31: Riley and Sulu rub their hands strangely as Kirk and Spock wonder about Joe's behavior.
20 1:03 Joe Goes 0:00: McCoy is puzzled at Joe's death.
Sulu Finks Out 0:16: Sulu invites Riley down to the gym for a workout while on duty (the Infection motif is developed with added brass).  He leaves.
21 3:10 Up the Rebels 0:00: Riley begins talking about Irish ability (lilting "Irish" theme begins in winds).  Spock orders him to report to sickbay (brief Hero motif).  When he eventually gets there he flirts with Nurse Chapel and gives her the alien infection.
D'Artagnan-san 2:04: Sulu fences shirtless in the corridor and threatens other crewmen (rising brass swashbuckler fanfares, "sneaking" music).  Kirk arrives back at the bridge.
22 2:13 Banana Farm 0:00: The planet's gravity shifts again, requiring a quick adjustment.
0:30: Sulu arrives on the bridge with his sword (swashbuckler fanfares).  Uhura distracts him and Spock gives him a Vulcan nerve pinch.
1:11: (Partially unused) Kirk finds out that Riley has taken over the engine room (Irish theme over Captain's theme).  Spock warns Kirk of the ship's impending crash into the planet.
23 1:51 Out of Control 0:00: As the ship spirals down, Kirk rushes to meet Scottie outside the engine room.
Lurch Time 0:21: The ship lurches from the planetary gravity interference (danger fanfares).
Punchy Kid 0:41: Scottie works inside the Jefferies Tube as Riley sings (tense piano/snare intercut with Irish theme).  The ship is momentarily stabilized.
24 1:36 Party Time 0:00: Spock urges Scottie to break through the engine room door faster (Hero motif).  In sickbay, McCoy examines Sulu.  He leaves and Nurse Chapel begins playing with her hair.
1:21: On the bridge more crewmen become sick.
25 4:32 Medicine Girl 0:00: Spock encounters an amorous Nurse Chapel (led by cello with heavy vibrato).  She infects him and he struggles to control his emotions (rising and falling figures in contrary motion).
3:53: Kirk and Scottie get to the engine room and arrest Riley.
Hot Skin 4:07: Kirk finds out that Riley has  turned off the engines and that it will be impossible to restart them before the ship crashes.  Uhura reports the outer hull heating up.
26 1:08 Off the Cloud 0:00: The ship continues to descend.  Kirk talks to Scottie about a controlled implosion (Captain's theme in trumpet layer).
0:36: McCoy's hypo cures Sulu out of his infected state.  
27 4:02 Captain's Wig 0:00: Kirk finds a distraught Spock (figures in contrary motion).  He slaps Spock.  They tussle and Kirk also gets infected.  Spock gasps about an intermix formula to save the ship (fateful Captain's theme in rising harmonies).  Kirk rallies and gets hold of himself (poignant cello).  He tells Spock and Scottie to prepare for the implosion.  He makes his way to the bridge (fateful Captain's theme/poignant cello, rising winds).
28 2:45 The Big Go 0:00: Kirk enters the bridge and McCoy gives him a shot (fateful Captain's theme developed with suspenseful snare roll pulse).  The crew prepare to jumpstart the ship.  Kirk briefly looks at Yeoman Rand (poignant cello figure, Trek theme).
1:30: Kirk orders the bridge to engage the intermix formula and the modulated warp implosion begins (Hero motif developed in brass layers).  After a moment of discomfort, the crew are successful and escape the planet (falling wind figures).
29 1:50 Time Reverse 0:00: Sulu reports that his chronometer is running backwards (trumpet/glockenspiel ostinato joined by fateful brass).  Kirk orders Sulu to slowly reverse power (ostinato slows, halts).  Time returns to normal (Trek theme developed in horns, trumpets, winds).
Future Risk and End Title 1:14: Kirk orders Sulu to resume course (Captain's theme developed).
30 1:07 Trailer
('Mudd's Women')
Trailer (slinky brass and jazz rhythm, Captain's theme variations, danger fanfares).
31 0:46 End Title (electric violin version)


Links
Star Trek TOS Music Wiki
Lala-Land's "Star Trek: The Original Series Soundtrack Collection"
Star Trek: The Original Series Soundtrack Collection on Star Trek Soundtracks.com

Thursday, May 12, 2016

Woman in the Dunes (Takemitsu, 1964)


     One of Japan's most fascinating film (and concert) composers was Toru Takemitsu (1930-1996), whose stylistic palette was immensely broad, yet at the same time somehow very individualistic.  Takemitsu wrote for every type of ensemble imaginable, but in Hiroshi Teshigahara's film, "Woman in the Dunes" (砂の女, Suna no Onna, "Sand woman"), he uses a small chamber group sound to evoke the ancient heartbeat of a cruel desert.  The film is somewhat hard to describe, but it's essentially about a man who has been trapped by villagers into helping a woman scoop out sand from around her house.  He cannot escape because the woman's house is in a sand pit and the sand is unclimbable.  The man and woman develop a relationship.  In a way, the story is both Twilight Zone-ish and Kafka-esque, and and has been interpreted in many different ways (however it does have a 100% rating on Rotten Tomatoes!).


     Musically, only about 15-20 minutes of score is heard in this 2 and a half hour study in forced domestic captivity.  The music is basically ambient, in that it features long held textures (string drones) broken by brief moments of scurrying activity, or simply just isolated accents, probably (my guess) meant to reflect the image of rippled sand being blown over dunes.


     The music was first available domestically as a 7 minute suite on The Film Music of Toru Takemitsu (Nonesuch Records, 1997,  also The Film Music of Toru Takemitsu 4 in Japan, 1991).  A longer, expanded release was made available on the Complete Takemitsu Edition 3: Music For Movies 1 (Shogakukan, 2003), though even that is only 10 and a half minutes' worth.  The below table describes the scenes and cues from the expanded 2003 release (the 1997 release included Parts 1, 2 and 4 from the table below). 


Part 1 2:34 Pullback from sand grains to a man climbing, walking over and descending sand dunes with a walking stick.  He reaches an ocean shore.

Layers of mostly high string drones/glissandi, punctuated by 4 bursts of aleatoric bass clarinet/flute/harp/guitar.
Part 2 2:22 The man (a teacher) sits in the sand.  He looks over some insect specimens he's gathered.  A voice-over wonders about identity and society.  The man lies down and seemingly has a dream.  An image of a woman walking on the sand is super-imposed.  The woman squats and observes the man.

Low drones joined by dissonant high string drones, interrupted by a harp/guitar accent, a burst of falling-rising winds and a burst of subtle metal percussion/harp/low winds.

1:38: A local man tells the teacher that the last bus has left, but he will look for a place for him to stay the night.

Wind sounds.
Part 3 0:43 The sand woman sings a lullaby while the man sleeps after trying to escape (source music).
Part 4 1:50 The teacher tries to damage the house and the sand woman tackles him.  The man grabs one of her breasts.  The house shakes and sand falls in.

Reverbed metallic impacts with a few dry wood impacts, wind-like sirens, echoed creaking sounds, rustling sounds.
Part 5 3:04 The teacher wakes up after a tryst with the sand woman and sees a mirage of water outside.  He drinks the last drops from an empty water pot.  He rubs mud on his face and then spits it out in disgust.  He agrees to start working on the sand again.

Isolated harp figures, low string glissandi joined by harp arpeggios/flutter-tongued flute, scraping sounds.  The low strings become a tremolo climax with harsh noise elements.
 

Links
Woman in the Dunes (Suite from Parts 1, 2 and 4 on YouTube)
Toru Takemitsu Wiki Entry
Woman in the Dunes Wiki Entry
A Guide to Toru Takemitsu's music (The Guardian)